
Camp 3 (23,500 feet or 7160 m) to the Summit (29,029 feet or 8,848 m)
The Yellow Band (top at 25,000 feet or 7620 m: 1-3 hours from Camp 3). The push up from Camp 3 starts as a rapid ascent to the Yellow Band - a strip of sedimentary sandstone rock that appears yellow from all angles. Here (below) is a good picture of the Yellow Band:
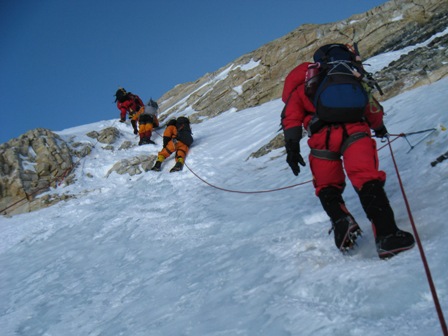 |
| Image from Valerio Massimo Everest Expedition 2009 |
In the video, Dave Lageson - a geology professor at Montana State University - describes the composition of the Yellow Band. He along with team leader Conrad Anker, climbed Mt. Everest in 2012 with a team from the Everest Education Expedition. Watch the video and check out Dave's other educational materials if you find this topic interesting. OK, back to the route.
Dry Tooling. You can clearly see that the Yellow Band is a stark departure from the glacier travel that we covered over the past three legs. Finally, some rock! Of course, that departure from the normal glacier creates some problems for climbers who are not accustomed to "dry tooling" on rock. The Yellow Band is brief (100m of rope at the most to traverse it) and does not require too much energy to overcome these days due to fixed ropes and well packed down routes where snow may exist. Also, there is little vertical gained during the crossing of the Yellow Band. We simply traverse the route to aim toward the next objective.
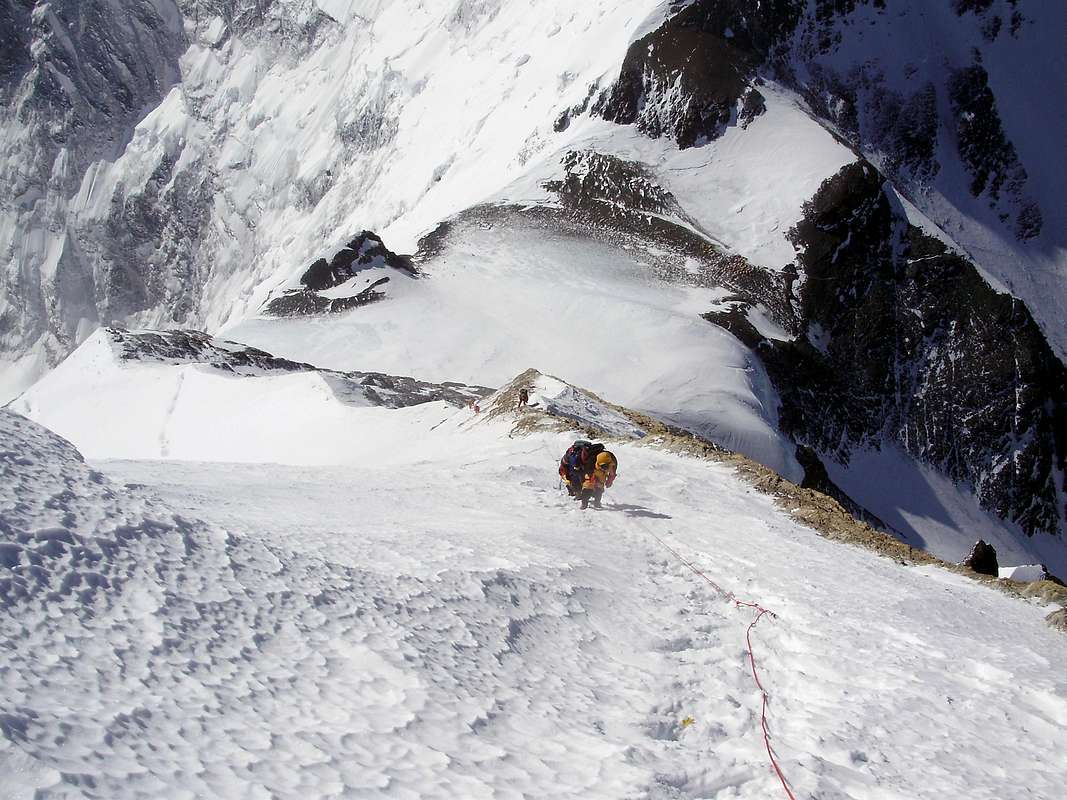
The Geneva Spur (25,500 feet or 7,772 m - 1-2 hours from the Yellow Band). Once past the Yellow Band, we head up past the point where the Lohtse climbers bear to the right while we Everest climbers climb on toward the Geneva Spur. Here is an excellent image of what the spur looks like (see below):
 |
| Image from Landtarget blog taken in 2008. |
South Col or Camp 4 (26,400 feet or 8000 m: about 1 hour from the Geneva Spur). Passing the Geneva Spur and pressing onward, climbers approach the South Col in about an hour. The South Col is where climbers enter "The Death Zone" or the altitude where climbers' bodies cannot sustain life. At the Col - a flat portion of the climb that forms the saddle between Everest and Lohtse - some expeditions setup a camp to allow tired climbers to rest and recover from the 3-6 hours of high altitude climbing. The South Col is a windy place that offers very little shelter from Everest's brutal conditions. Below is an excellent photo from the South Col. You can see that most climbers use oxygen at this point. Also, you'll notice a huge cache of oxygen bottles - most full and ready for climbers who pass by the Col and head up towards the summit.
 |
| Photo from Scott Simper Productions and taken in 2013. |
"The Balcony" (27,500 feet or 8380 m: 3-6 hours from the South Col). Climbers leave the South Col and head up the Triangular Face toward "The Balcony" - a small platform used by many expeditions to cache equipment, to take a brief rest before pushing upwards, and, of course, to take pictures of nearby peaks. Here (below) is an excellent video that shows the views from the Balcony.
 |
| Photo from Everest Hip Hop Expedition in 2010. |
The South Summit (28,500 feet or 8690m: 3-5 hours from "The Balcony"). The ascent up takes us now to the South Summit Ridge where the real summit push begins in earnest. Climbers flagging at this point should turn around because this section can really test the resolve of even the most dedicated climber. Here, there is a well-worn path with fixed ropes that takes you up to the summit. Getting to this point, however, takes some time. Below is a picture from the South Summit upwards to the Hilary Step and then onwards to the summit.
 |
| Photo from Ian Rogers' Climb4Life website and expedition in 2009. |
 |
| Photo from Summitpost.org. |
The Hillary Step (28,740 feet or 8760 m: less than an hour from the South Summit). A brief push up from the South Summit lies the famous Hillary Step named after famed New Zealand mountaineer who climbed Mt. Everest for the first time in 1953 with Tenzing Norgay. I guess only Hillary got the benefit of a route obstacle named after him. At any rate, the Hillary Step offers the last major hurdle for the climber to reach the summit.
 |
| The Hillary Step. Photo appeared in the blog livefortheoutdoors.com. |
The Summit! (29,029 feet or 8848 m; about an hour from the Hillary Step). Yes! We made it to the summit. From the South Col, a climber can expect the summit push to take between 7 and 14 hours just to reach the top. Typically, wise, seasoned climbers use a cut-off of 3pm (local time) to get off the summit. If a climber leaves the South Col at midnight and they take 14 hours to reach the summit, that climber has a 1-hour safety period (2pm arrival at the summit). Thus, the forecast for a climber's speed can be a vital element in a successful summit attempt. Climbers who climb slower than their window of opportunity ought to turn around prior to reaching the summit or risk the threat of not making the return trip. Many people make that mistake and find themselves in trouble and without any possibility of help. There are no rescues from this elevation; every climber is on his/her own.
OK, enough drama. Here is a great picture from the summit of the world. It is only fitting that I use one of Dan Mazur's pictures from his SummitClimb website to cap off this wild ride up the South Col route to the Mt. Everest summit.
 |
| Photo by David O'Brien who summited on May 23rd, 2013 |
So now you know the route. Follow along with me while I attempt to climb it. It should be a fun ride for us all.
A recap from Camp 2
For a full recap, listen to Kenton Cool describe the summit route from Camp 2 upwards. He provides a really nice summary of the points I described in detail above. Kenton adds a certain bit of color that might be absent in the writing above. I recommend you watch these videos for an expert's perspective.
Video 1
Video 2
A full summary
Another good perspective of the entire climb is to look at an elevation map where the altitude gets plotted as a function of the days on the mountain. Below is one example of an elevation map.
 |
| Image from climb8850.com blog. |
Expect two more posts before I push off for Kathmandu shortly. See you soon....
This comment has been removed by the author.
ReplyDelete