
OK, onward and upward towards the summit.
Camp 2 (21,000 feet or 6400 m) to Camp 3 (23,500 feet or 7160m) represents a big push in altitude (2,500 feet or 760m) over a relatively short distance (1.64 miles). That change in altitude comes from ascending the Lohtse face. Below is an excellent image courtesy of the Alpinist.com:

As you can see from the picture above, the route starts off pretty flat - actually a gradual uphill section to the Lohtse face. At the junction between the flat section and the face lies the bergshrund on the route at about 22,000 feet (6700m). The bergschrund is the section of the glacier where the moving part of the glacier begins - moving downwards obviously - and the permanent or stagnant ice/loose snowpack - also called firn - lies above that moving part. You can see in the image above that the bergschrund presents a challenge for climbers to overcome a large crack or crevasse. Once climbers get past the bergschrund, they must ascend the Lohtse face via fixed ropes. In truth, there is nothing that mandates climbers use the fixed ropes and some elite alpinists avoid them at all costs to preserve their pristine ascent and avoid the traffic jams that frequently occur on the fixed ropes. The rest of us mere mortals grab the fixed ropes, lock in our ascenders, and climb the route like a centipede with climbers streaming up along the entire route.
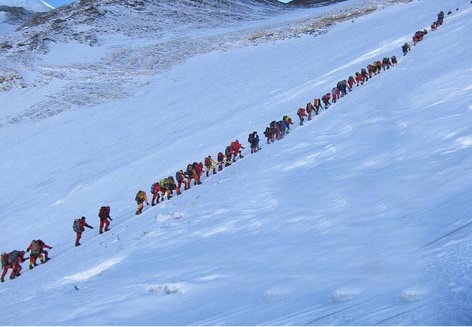 |
| Image from eightsummits.com depicting the crowds on the South Col route. |
Traffic on the route. These lines are dangerous. Unlike traffic back-ups in driving, the climbing log jams on Everest make the ascents much longer for all climbers and result in a greater likelihood of frostbite and hypothermia. Not only are climbers likely to get cold but also they are more likely to waste precious energy just waiting around in between steps. More waiting means more energy consumed for the same route. Climbers get sick or tired or both when waiting. There are many ways to prevent these traffic jams but most are ignored by the Nepali government, climbing teams, and Sherpa. We all want to climb and it just turns into a mess when there are too many climbers climbing up a one-way fixed route. Hopefully, the traffic will not be so great when I arrive late in the climbing season.
Camp 3. Once we ascend the fixed ropes up the Lohtse face, we arrive at Camp 3 - a little flat spot or sets of flat spots about half-way up to the South Col and just below the famed Yellow Band.
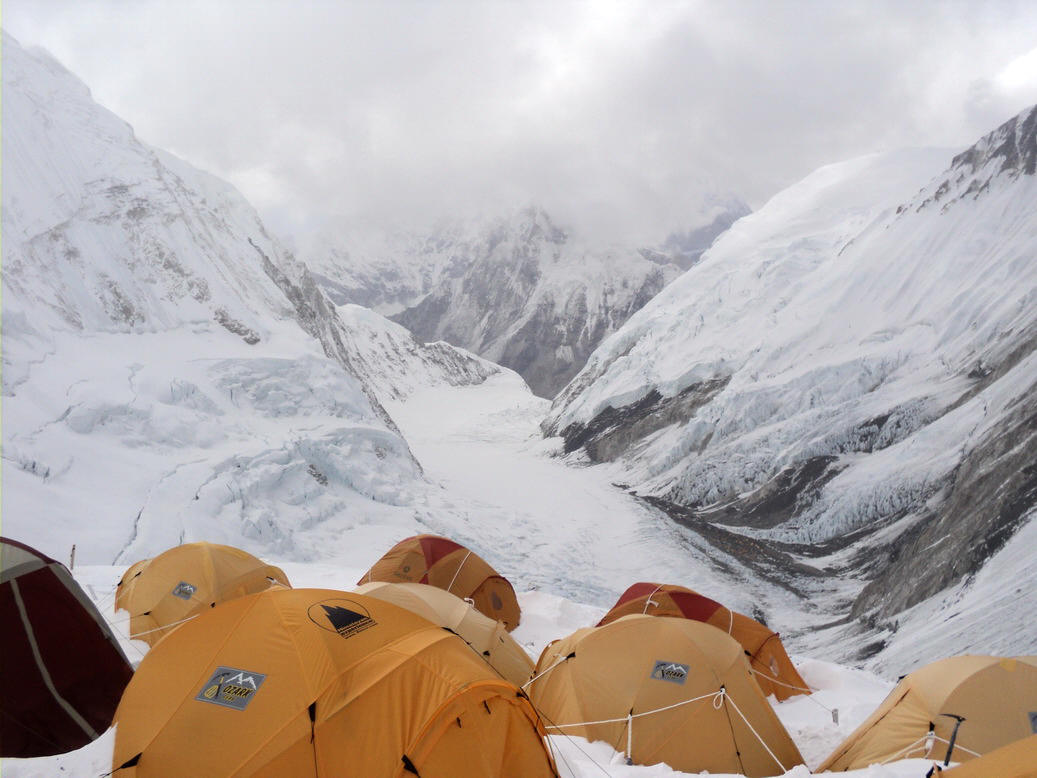 |
| Photo courtesy of Tom Claytor who summited Everest in 2010. |
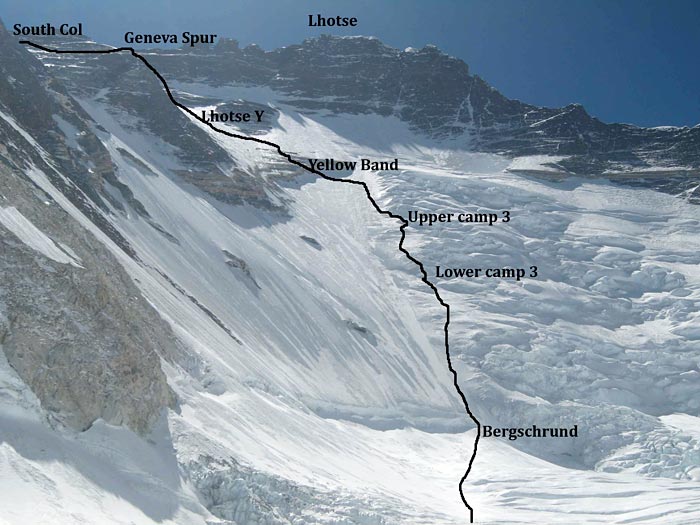 |
| Image copied from the IMG page documenting the South Col route up Everest. |
No comments:
Post a Comment